top of page
8. Bisque Firing
Bisque firing changes the composition of clay and makes it easier to apply glazes on the clay.


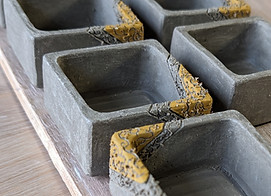
I check the pieces for any remaining burrs, sand the lip and base of each peace, and carefully remove any dust.

I remove burrs with a brush or sandpaper.
8-1, Deburring
8-2, Loading for bisque firing
・I start bisque firing once I've accumulated a certain number of pieces. If the quantity of pieces is too small, temperature fluctuations in the kiln become unstable, and that increases the risk of breakage. Firing too few pieces is also uneconomical, given the time and cost involved.
・If the clay pieces aren't completely dry, remaining moisture inside them will expand during firing and cause them to explode.
・When loading the kiln, pieces can be stacked on each other and I arrange the pieces evenly throughout the kiln without concentrating them in one area. As the clay is in its most fragile state at this stage, I handle the pieces with extreme care.
・For large pieces and large slabs, I place them on thin shelf supports (tsuku) or similar supports to prevent cracking during cooling. I take care to avoid rapid changes in temperatures during firing.

8-3, Bisque firing
(h)
(℃)
Ignition – Moisture removal (about 6 hours)
0
6
12
19
21
45
300
600
760
I open the sliding doors to the studio and turn on the exhaust fan in the kiln room to ensure a smooth airflow and a sufficient supply of oxygen.
I open the kiln damper, open the valve on the oil tank, then ignite the 4 burners. I open the air supply and adjust the oil flow, so that the flame on each burner is uniform. I close the kiln door and leave a small gap. After 30 minutes, I check the flames again and make adjustments.
*Damper --- A plate located in the exhaust path that is opened or closed to physically allow or block the flow of gas.
After 3 to 4 hours, I close the door further, leaving a small gap.
After another 2 hours, I close the door completely, hold my hand over the 4 viewing holes, and once I can no longer feel any moisture, I close the holes. I attach thermocouples to two locations on the upper and lower parts of the kiln door and set the pyrometer. I adjust the fire to bring the temperature up to about 300°C over the course of about six hours.
Firing (about 13 hours)
Even clay pieces that have been thoroughly dried still contain some residual moisture. Steam bursts are likely to occur at around 240°C, so I raise the kiln temperature slowly, and take extra care when large pieces are inside.
At around 570°C, the silica in the clay expands. I take my time firing the pieces, gradually raising the temperature up to 600°C.
I check the upper and lower temperature readings to confirm that the temperature inside the kiln has risen to around 600°C, then I increase the heat. I set the alarm on the upper thermocouple to 760°C. I keep an eye on the temperature and the flames from time to time.
There is always a temperature difference between the upper and lower areas inside the kiln. When the overall temperature reaches around 760°C, I check inside the kiln through the viewing holes. Once I confirm that the pieces and the interior of the kiln have taken on a translucent red glow, I turn off the fire, close the damper, and close the valve on the oil tank.
100
Cooling (about 24 hours)
There is a risk of the pieces cracking even during cooling, I let the kiln cool slowly on its own.
Once the temperature inside the kiln drops below 100°C, I open the kiln door slightly.
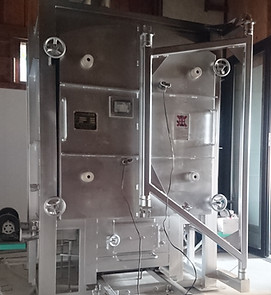

8-4, Unloading
I open the kiln door a little at a time.
After bisque firing, the clay does not revert to its original state even when water is added. The clay absorbs moisture well, which makes it easier for the glaze to adhere to the body. This makes the glazing process easier and safer.
Although the pieces are now stronger than before bisque firing, they are still fragile, and I treat them with care when removing them from the kiln and handling them. When holding a mug by its handle alone, the handle may break off. If that happens, the handle cannot be reattached.
8-5, Sanding and dusting
I check each piece carefully for defects and remove any remaining burrs with sandpaper. I gently sand the lips and bases and brush off any dust. If dust remains, the glaze may not adhere properly.


bottom of page